 Sign up
 Log in
 Sign up
 Log in
A mod called Advanced Rocketry adds new ore types to the game, which will allow you to craft new devices and blocks as well as get new energy that will make it possible to fly into space on rockets.
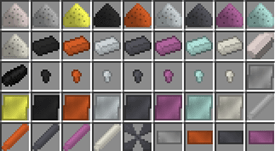
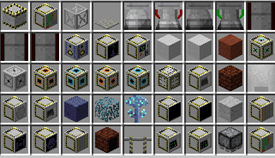
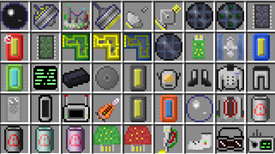
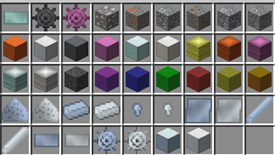
In the Overworld, you can now see a round sun during the day and the moon at night — this is the first innovation the mod brings.


Six new ore types have been added to the game: copper, tin, aluminum, rutile, iridium, and dilithium. They can be found in caves. You can mine them even with the iron pickaxe. However, dilithium can only be extracted with the diamond tool. When mining the ores, a block of ore is dropped. You need to smelt it, thereby obtaining ingots used for crafting. The respective ores are obtained after smelting, but when you smelt the rutile ore, you will get the titanium ingot.


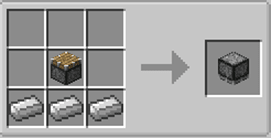
The small plate presser is crafted from a piston and three iron ingots. It is used to create plates from various metal blocks, namely iron, tin, copper, and others. For the press to work, it is necessary to build a small structure. The main thing is to ensure one free block between the ground and the press, and you also need to provide the redstone signal to it, say, using a button or lever. The most important thing is that the lower block must be obsidian. One block gives four plates.

There are two types of generators that help create energy at the initial stages of development. One of them is the coal generator, which creates energy using coal. It is crafted from a furnace and a small battery. This block generates energy quite quickly. The solar generator is the easiest way to generate energy, but its performance is lower: only 1 Rf/t compared to 40 Rf/t of the coal generator. It is crafted from the solar panel, small battery, and power output plug.


The solar panel is created from three gold plates, three redstone dust, two glowstone dust, and the machine structure. It cannot generate energy by itself but only as part of a structure called the solar generator.


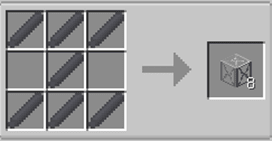
The power input plug is crafted from four small batteries and a machine structure. It is used for crafting many mechanical blocks. If you process the power input plug in the crafting table, you will get the power output plug. The machine structure is an equally important block crafted from four iron plates and four rods. You will get 16 blocks at once.


The small battery is a very important item, as it is used in many crafting recipes. It is created from an iron rod, four tin plates, and two redstone dust. The iron rod is crafted from three iron ingots. The battery is used as an item that absorbs energy.


The holo-projector allows you to build various structures that will help you to extract and process other blocks. To craft it, you need two optical sensors, an iron plate, and three redstone dust. The holo-projector allows you to erect 21 structure types. To open its menu, press Shift+RMB. Then you need to select the necessary building, close the menu, and click on the ground where you want to build it. Then the construction scheme will be shown, according to which it will be very easy to complete the task, as even the names of the blocks are specified there.


Thus, to build the electric arc furnace, 72 heat proof bricks, 3 coils, 11 input hatches, 3 power input plugs, and the electric arc furnace block itself are needed. This structure is necessary for further development because it is in it that various alloys are made necessary for crafting certain blocks.


The mod features five types of coils, which differ in terms of efficiency. A coil can be crafted from gold, copper, titanium, aluminum, and iridium. The iridium coil is the most efficient. The coils are crafted very simply — from eight respective ingots — and used in some structures.

The most common alloy is steel. To smelt it, you will need the electric arc furnace. The steel is created from an iron ingot and charcoal. You will need precisely charcoal, as coal will not suit. One iron ingot and charcoal give one steel ingot.

The rods can be crafted from five different ingots — iron, copper, steel, titanium, and iridium. They are used in many mechanical devices and crafted from three ingots of one type. You can also produce the rods in the lathe. It is more efficient, as you will get two rods from one ingot in this case.


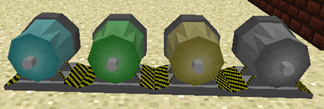
To create the lathe, two new blocks are necessary — the lathe itself and the motor. There are only four types of motors, which differ in terms of performance. They are crafted similarly, differing only in the materials. For the motors of the first and second tiers, steel plates and rods are used. Only the coils are different: in the first case, a copper coil is used, and in the second case, a gold one. The enhanced motor is crafted from the titanium components and an aluminum coil. The elite motor is twice as good as the latter and is created from the iridium objects and a titanium coil.

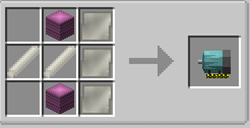
The lathe block is crafted in a quite complicated manner: it requires two iron rods, two steel plates, a steel gear, a machine structure, a user interface, the item IO circuit board, and the control circuit board.


The gear can be created from two ingots — titanium or steel. This is the only difference. The gear is used for crafting many blocks.
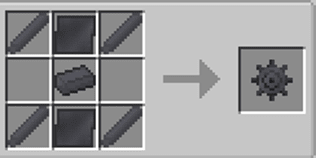

To fly to other planets, you need the space suit. Its helmet is crafted from three blocks of wool of any color, three iron rods, two iron plates, and a glass pane. To create the space suit chest piece, you need six blocks of wool of any color, the liquid fuel tank, a steel fan, and an iron rod. The leggings are created very simply: from six blocks of wool and an iron rod. The boots can be made of two blocks of wool, two plates, and an iron rod. By default, the space suit does not have special functions necessary for survival in space. You need to fill it with oxygen first.


After you put on all the elements of the space suit, a new oxygen bar appears, and all the equipment pieces are shown in the upper left corner. The space suit can be improved for you to feel comfortable in space. To do this, you need to craft the suit workstation. It s created from a crafting table and a machine structure. Each equipment piece can be enhanced. There are four improvements for the helmet. The anti-fog visor will allow you to improve visibility in fog. The beacon finder will help you not to get lost if you build the beacon. The hover upgrade will allow you to fly without any restrictions. The flight speed control upgrade will increase your flight speed.


To craft all these enhancements, you need to create the precision assembler structure in the holo-projector. This device also needs energy. To craft the anti-fog visor enhancement, you will need the basic lens, created from glass panes and the advanced circuit in the cutting machine. The hover upgrade requires the basic circuit, the control circuit board, redstone dust, and a redstone torch. The flight speed control upgrade is crafted from the control circuit board, advanced circuit, diamond, and fire charge. To create the beacon finder, you will need the anti-fog visor and the tracking circuit, which can also be crafted in this device. It will take as many as 45 seconds.
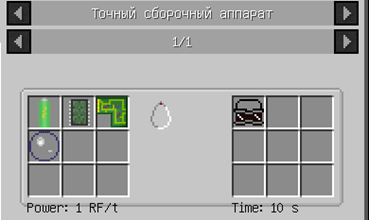

The chest piece also has unique improvements. It can be enhanced with the pressure tank, which allows you to carry more oxygen. There are three types of the tanks: low-pressure, high-pressure, and ultra-high-pressure. All of them are crafted in the rolling machine — another structure that can be built thanks to the holo-projector. To create the low-pressure tank, you will need water and two iron sheets. The high-pressure tank requires aluminum sheets, and the ultra-high-pressure tank needs titanium sheets. All these sheets can also be made in the rolling machine using water and the respective plate.


Besides, the chest piece can be enhanced with the jetpack created in the crafting table. For the jetpack to acquire more useful properties, you should use the pressure tanks. Now, for the latter to work, they need to be filled with oxygen. This can be done in the oxygen vent, and so that this structure works, it must have a source. To get oxygen from the vent, it is enough just to stand on it. To use these tanks, you need hydrogen, which can also be filled in the vent. Hydrogen is used for flying with the jetpack.


The leggings also have an enhancement in the form of the bionic legs. They can be crafted in the precision assembler from the motor, the control circuit board, and the advanced circuit. This improvement allows you to move faster. Moreover, these legs can be further improved to increase the speed. There are four slots for this.


The last enhancement for the space suit is the padded landing boots. They are crafted from the leather boots, a feather, the advanced circuit, and the control circuit board. This improvement allows you not to take damage even if you fall from a high point.


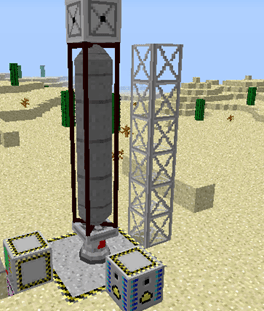
To build the rocket, you will need the launch pad. This structure consists of three blocks: the launch pad, structure tower, and rocket assembling machine. The launch pad determines the size of the rocket; that is, its length and width. The main thing is that the structure must be rectangular. The structure tower determines the height of the rocket, which can be any. The rocket itself is created in the rocket assembling machine.


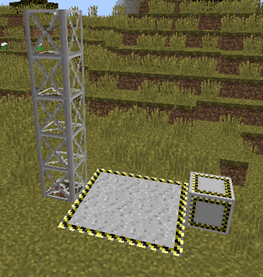
For the rocket assembling machine to work, it needs to be powered with energy. To build a rocket, you need four main blocks: the liquid fueled engine, fuel tank, guidance computer, and seat. It is better to use several engines, and this also applies to the tanks. The structure under consideration must be on the launch pad. After building, the rocket needs to be scanned in the rocket assembling machine. A scanner will appear for a few seconds, showing you the characteristics of your rocket — its mass, thrust, fuel, and assemblage accuracy. You can also use other blocks, but they will not affect the rocket's operation. To increase the thrust, you can use the advanced rocket engine, which is crafted from an alloy of titanium and aluminum. After scanning the rocket, click the 'Build' button, and it will become an actual structure.


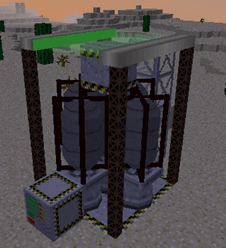
To fuel the rocket, you need the fueling station and rocket fuel. The former needs energy to operate. For the fuel to fill the tanks, you will need the linker. To launch the rocket, you need the planet ID chip, which allows it to determine the landing point. You can fly only to the moon, though. After exploring the moon, you need to change the landing point to return back.


Besides the rockets, you can create satellites. To assemble the satellite, you will need the engine, tank, and satellite bay. It can be done on the launch pad in the same devices. After you build the satellite, it also needs to be scanned and fueled. The main thing is that all the values be green. For the satellite to fly, it must be placed in the satellite bay. The satellite is crafted in the satellite assembling machine.

| VERSION | DOWNLOADED DATE | VERSION TYPE | TYPE | SIZE | GAME VERSION | DOWNLOADS | |
|---|---|---|---|---|---|---|---|
| 1.12.2-2.0.0-17 | 30.07.2023 | forge | R | 6 MB | 1.12.2 | 7 k | Download |
| 1.12.2-2.0.0-13 | 22.05.2022 | forge | R | 6 MB | 1.12.2 | 21 k | Download |
| 1.12.2-2.0.0-12 | 22.04.2022 | forge | B | 6 MB | 1.12.2 | 18 k | Download |
| 2.0.0-7 build 7 for 1.12.2 | 19.04.2022 | forge | B | 6 MB | 1.12.2 | 225 | Download |
| 1.12.2-2.0.0-257-universal | 31.12.2021 | forge | B | 6 MB | 1.12.2 | 2 k | Download |
| 1.12.2-2.0.0-256-universal | 10.10.2021 | forge | B | 6 MB | 1.12.2 | 10 k | Download |
| 1.12.2-2.0.0-255-universal | 11.09.2021 | forge | B | 6 MB | 1.12.2 | 1 k | Download |
| 1.16.5-2.0.0-16 build -16 for 1.16.5 | 25.08.2021 | forge | B | 6 MB | 1.16.5 | 9 k | Download |


We couldn't open this item, please check if you have TLauncher running.

You have reached the maximum branch comments. Leave a comment above.

You must be logged in to perform this action.

Please fill in the field using Latin characters and numbers.

You have reached the daily limits for this operation. Try again tomorrow

На этой странице присутствует 18+ контент. Подтвердите, что вам есть 18 лет.

Are you sure you want to delete the comment?